1. Technical Characteristics
| Power Supply | PoE+ 802.3at Type 2, cat6 UTP 100m, or |
| Power consumption | Avg. 12W |
Connection | RJ45, WiFi, 4G optional |
Time Synchronization | NTP or GPS |
Communication Protocol | HTTP(S), MQTT(S), SNMP |
Storage SSD | 256GB (or more in option) |
| Operating Temperature | -25°C to +60°C |
| Operating Humidity | 10% to 95% |
| Weight | 2.2 kg |
| IP/IK rating | IP67, IK7 |
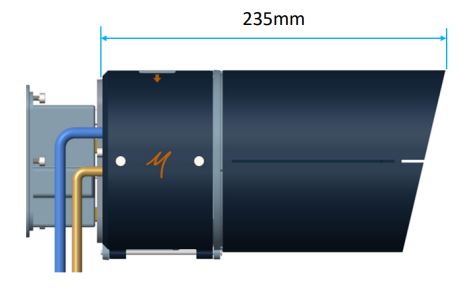
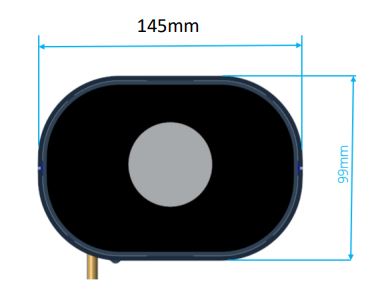
1.1. Dimensions
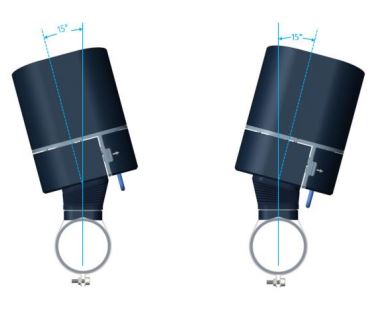
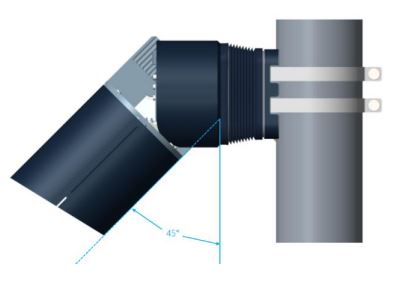
1.2. Pan & Tilt
2. Installation
Two ways of attaching the mounting plate.
2.1. On wall mounting
Distance between two holes: 41mm
Mounting plate: height: 60mm - width: 50mm
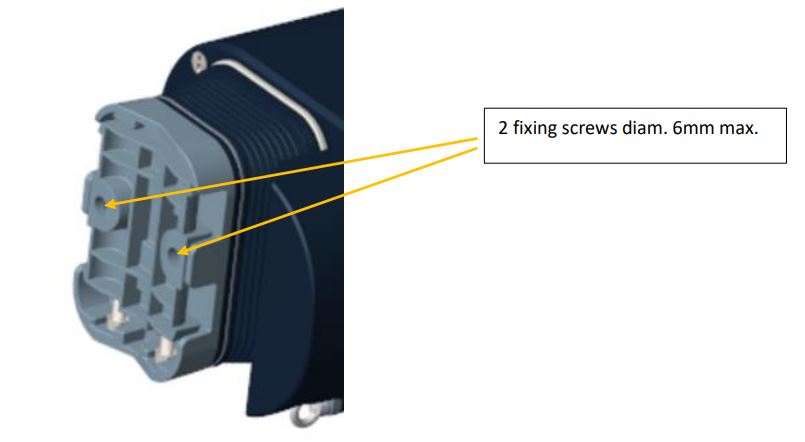
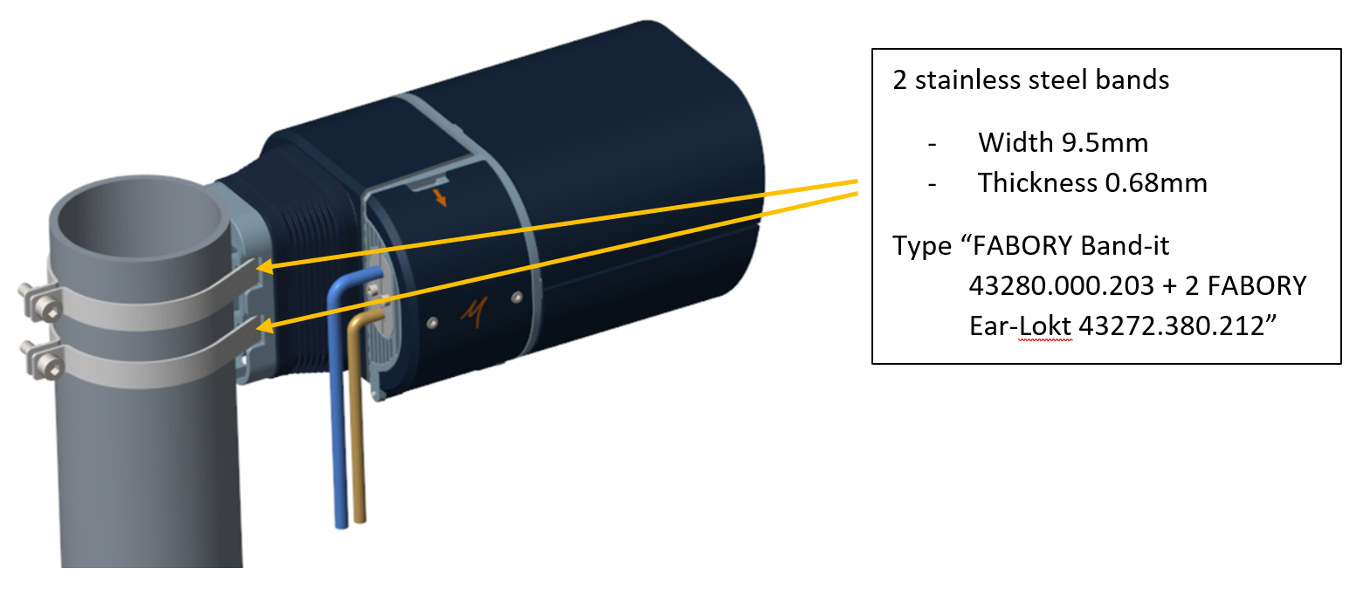
2.2. On pole mounting
For fixing the QCAM3 on a mounting plate.
Tool to use for this operation: Hex driver 2.5.

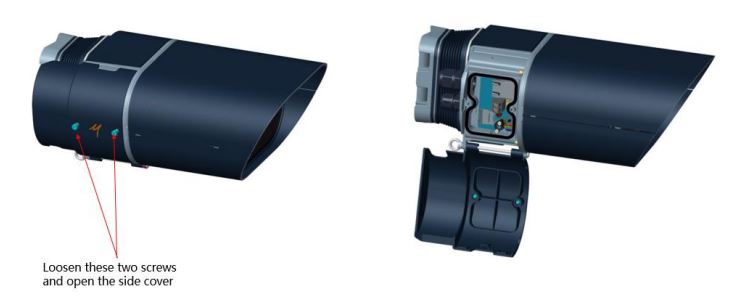
3. Electrical Installation
Tool to use for this operation: Hex driver 2.5
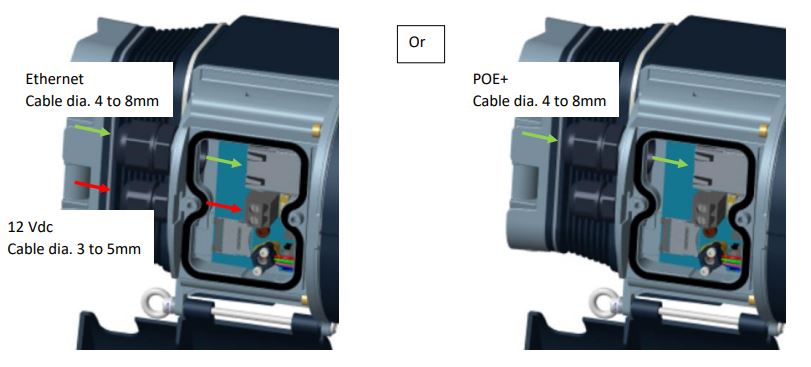
The unused cable must be protected by a blanking plug.
4. First connection
- Connect the camera with a RJ45 cable on POE+ switch.
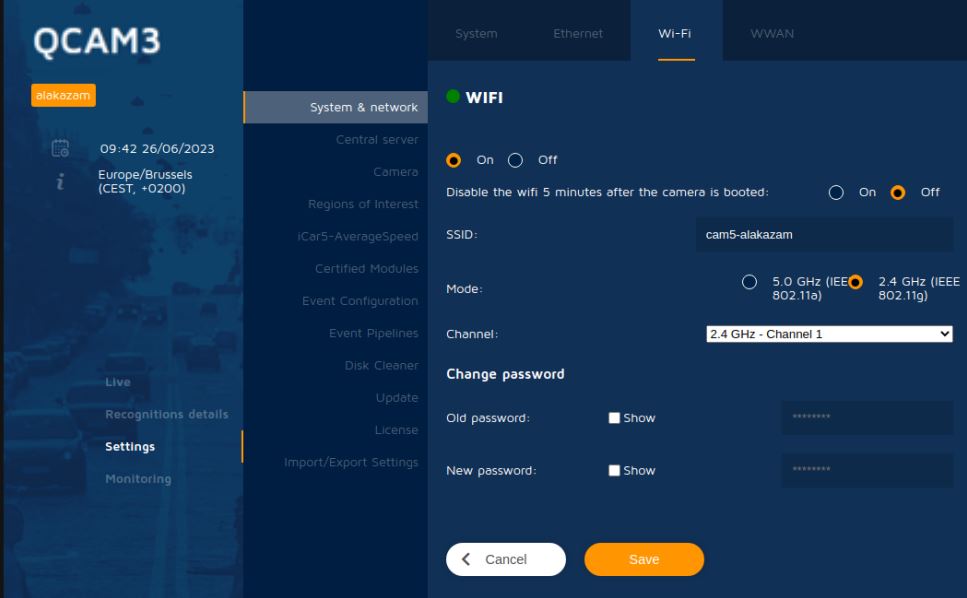
- Find the WiFi hotspot of the camera. (The SSID is the serial number of your QCAM3)
- Connect to WiFi hotspot
- On a web browser, navigate to: https://192.168.5.1
- Connect to the toolbox with default username and password: admin - admin
- For security reasons make sure to change the password via the toolbox
- Go to settings > Camera > Field of view, to configure the motorized lens and to move the camera
4.1. Network configuration
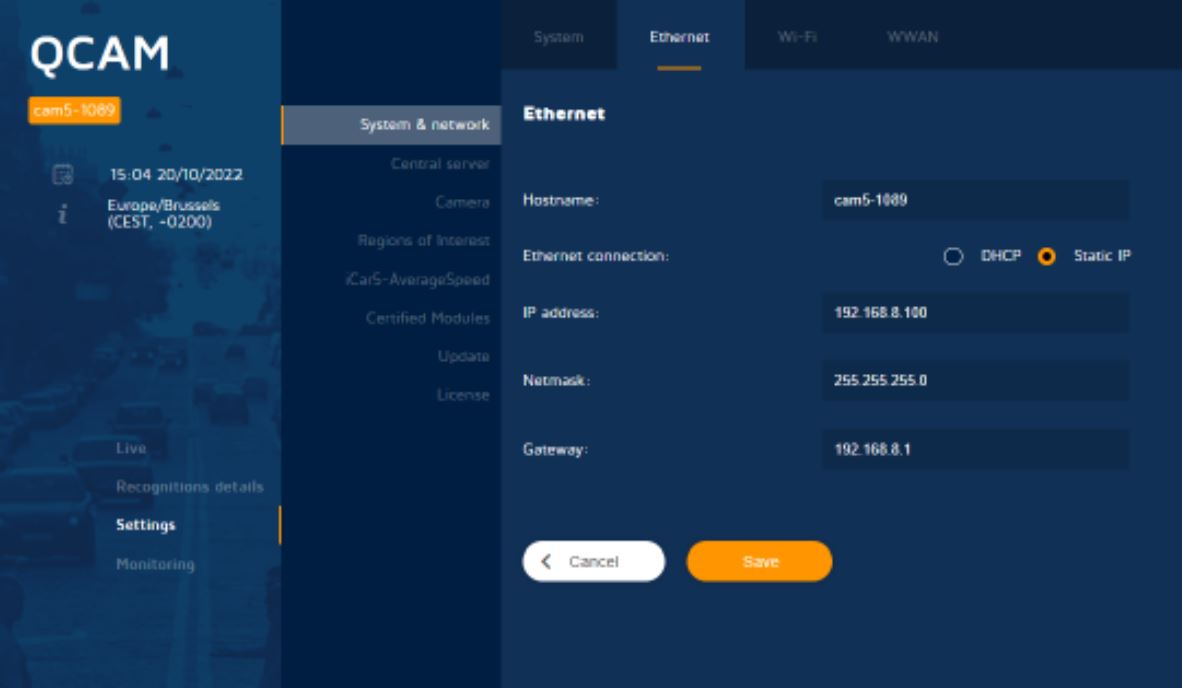
Set the IP address, Netmask, Gateway and click "Save".
Your QCAM3 is ready!
By logging on to the Toolbox, you can view detections in real time. You can also watch the stream.
If you'd like more information (api, usage, configuration,...), please don't hesitate to contact us.
5. FAQ Camera Installation
Yes, solar panel and battery are available upon request.
We recommend a height of 4m to 7m.
- The camera can monitor up to 2 lanes.
- The camera can detect vehicles up to 50m (depends on the focal length)
- The field of view should be set according to these parameters to have the best
performance.
There are 3 options available : 256GB (by default), 512GB and 1TB.
6. FAQ Camera Configuration
- Yes, the credentials can be changed through the toolbox to manage users and
password.
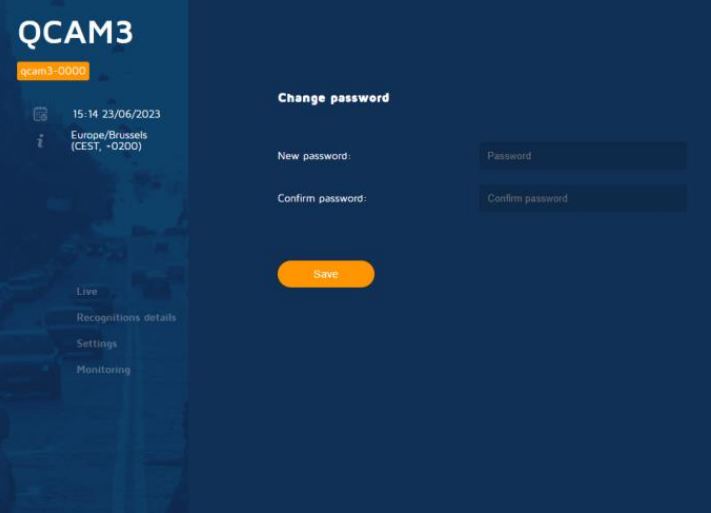
• Go to https://ip_address
• In the toolbox, click on “Change password” (button located bottom left).
• You’re now able to modify the default admin and user password.
Useful information about the status of the camera are available on the monitoring page
of the toolbox, information like CPU usage, Memory usage, GPS, Power consumption
etc. are continuously updated.
The SSD cannot be changed or upgraded by the customers themselves. The SSD can only
be changed when the cover of the camera is dismounted by which the guarantee is lost.
However, the customers can always make a request to our service center if they would
like to change or upgrade the SSD.
nce.
- There are 5 options available : 25mm, 16mm, 8mm or motorised focal: 12-50mm.
- The focal length is predetermined depending on the color or BW sensor and should be
decided before shipping the camera.
- Sensor settings: Adjust the sensors settings (Black and White or Color) until you get the
best image quality.
• Exposure: Time span during which the sensor of the camera is exposed to light when
taking a picture. This exposure time should not be too high for fast moving vehicles,
to keep a clear image. (on
the highway)
• Gain: Controls amplification of the image coming from the sensor.
• Illumination: Duration and Power of the infrared light pulse.
• Brightness: Adjust average brightness of the picture.
- Field of view:
• Adjust the Tilt and Pan settings until you get the best angle of view.
• Adjust the Focus and Iris to get a good picture of the desired context.
- Create the regions of interest: Lanes, Calibration Lines, Virtual Counting loops and
specific regions of interest.
7. FAQ Camera Usage
- On the live page select the icons of the type you search in the bottom of the page.
- Unselect other type.
- The toolbox provides two ways to search for a particular plate:
• Use the search box on the live page.
• Use the search plate feature in the recognitions details page for an advanced
search.
- You can use the Test campaign page that allows you to save a short video, up to 10
minutes, with the detections.
- You can choose when the campaign starts (useful to test by night or critical time of the
day).
- The test campaign saves the video, the detection list and the detections images.